🛠️ 1. Project Setup & File Organization
Step 1: Create a New Xcode Project
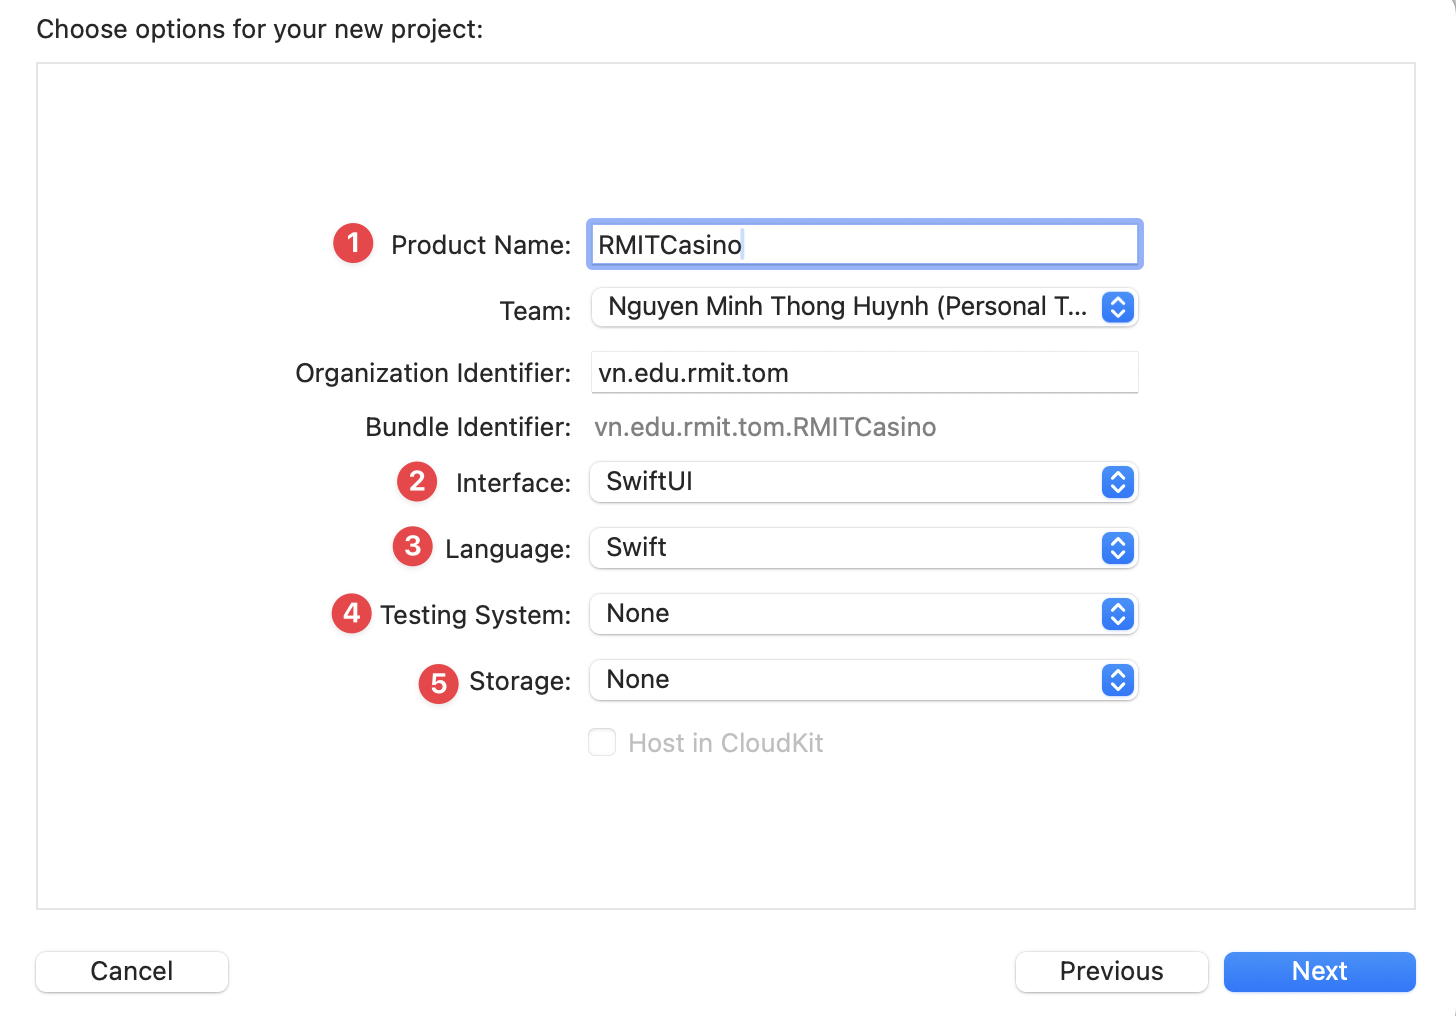
Instruction: Launch Xcode. On the welcome screen, click "Create a new Xcode project". Select the iOS platform and the App template. Click Next.
On the next screen, enter the following options:
- Product Name:
RMITCasino - Interface:
SwiftUI - Language:
Swift
Explanation:
This process creates a new, blank SwiftUI project. Xcode generates the essential files,
including ContentView.swift, which is where we will start building our user
interface.
Step 2: Prepare Assets (Images & Colors)
Instruction: First, you will need to gather the image assets for the game. For this tutorial, all required images can be found in the Asset Gallery and also on Canvas. You will need to find the following files:
- Logos:
rmit-casino-welcome-logo - UI Elements:
reel,spin,casino-chips - Slot Icons:
apple,bar,cherry,clover,diamond,grape,heart,horseshoe,lemon,melon,money,orange
- Open
Assets.xcassetsin the Xcode project navigator. - Create two new folders by right-clicking in the assets list and selecting "New Folder". Name
them
GraphicsandRMIT-Logos. - Drag the
rmit-casino-welcome-logoimage into theRMIT-Logosfolder. - Drag all other images into the
Graphicsfolder.
- In
Assets.xcassets, create another new folder namedColors. - Inside the
Colorsfolder, right-click and select "New Color Set". Create six color sets with the following names:ColorBlackTransparentRMITColorBlueRMITColorPurpleRMITColorRedRMITColorWhiteRMITColorYellowRMIT
- For each color set, select it, open the Attributes Inspector on the right, and set the "Appearances" to "Any, Dark".
- Click on the color swatch and set the RGB values as follows:
- ColorBlackTransparentRMIT: Red: 0, Green: 0, Blue: 0, Opacity: 35%
- ColorBlueRMIT: Red: 0, Green: 0, Blue: 84
- ColorPurpleRMIT: Red: 184, Green: 24, Blue: 121
- ColorRedRMIT: Red: 230, Green: 30, Blue: 42
- ColorWhiteRMIT: Red: 227, Green: 229, Blue: 224
- ColorYellowRMIT: Red: 250, Green: 200, Blue: 0
You can also use a color palette tool like Paletton to help you choose a set of colors that go well together. When selecting colors, consider using color theory to create a harmonious scheme based on your primary colors (e.g., RMIT Blue and Red):
- Adjacent/Analogous Colors: These are colors next to each other on the color wheel. They create a serene and comfortable design. For example, with RMIT Red, you could use adjacent oranges and purples.
- Triad: This scheme uses three colors that are evenly spaced around the color wheel, forming a triangle. It offers high contrast while retaining harmony. For example, a triad with RMIT Red might include a yellow and a blue.
- Tetrad (Rectangular): This scheme uses four colors arranged into two complementary pairs. It offers plenty of possibilities for variation but can be difficult to balance. For example, with RMIT Red and Blue, you could find their complementary colors (a green and an orange) to form a tetrad.
Explanation:
The Asset Catalog (Assets.xcassets) is where we manage all our visual assets like
images and colors. By defining custom colors here, we can easily reference them throughout our
app by name (e.g., Color("ColorRedRMIT")), making our code cleaner and easier to
maintain. Organizing images into folders keeps the project tidy.

🎨 2. Building the User Interface
Step 3: Add the Background Color
Instruction:
Open ContentView.swift. Replace the default content inside the body
with a ZStack containing a LinearGradient.
Explanation:
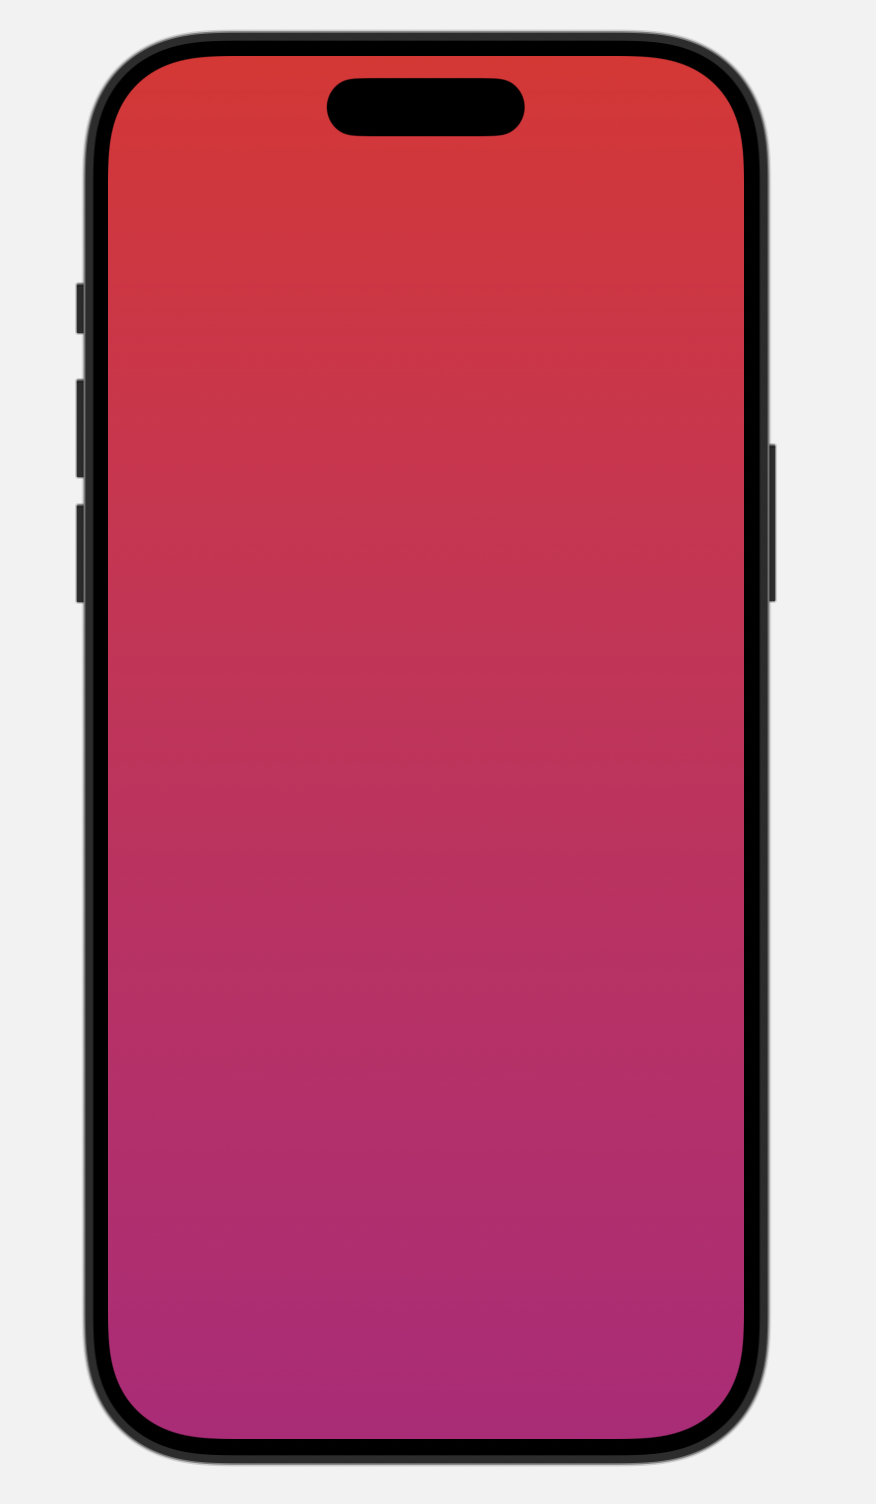
A ZStack is a container that layers its child views on top of each other. We'll use
it to place a gradient background behind all other UI elements. LinearGradient
creates a smooth transition between multiple colors. In this case, it blends from
ColorRedRMIT at the top (.top) to ColorPurpleRMIT at the
bottom (.bottom), creating a vibrant background. The
.edgesIgnoringSafeArea(.all) modifier ensures the gradient extends to the very
edges of the screen, including the notch and home indicator areas.
// ContentView.swift
struct ContentView: View {
    var body: some View {
        ZStack {
            // MARK: - Background
            LinearGradient(gradient: Gradient(colors: [Color("ColorRedRMIT"), Color("ColorPurpleRMIT")]), startPoint: .top, endPoint: .bottom)
                .edgesIgnoringSafeArea(.all)
        }
    }
}

#Preview {
    ContentView()
}
Step 4: Add LogoView
Instruction:
- Create a new file for the logo. Right-click on the
RMITCasinofolder in the Project Navigator, select "New File...", choose "SwiftUI View", and name itLogoView.swift. - In
LogoView.swift, add the code to display the logo image with some basic sizing. - Go back to
ContentView.swiftand add aVStackinside theZStack. Inside theVStack, add your newLogoView.
Explanation:
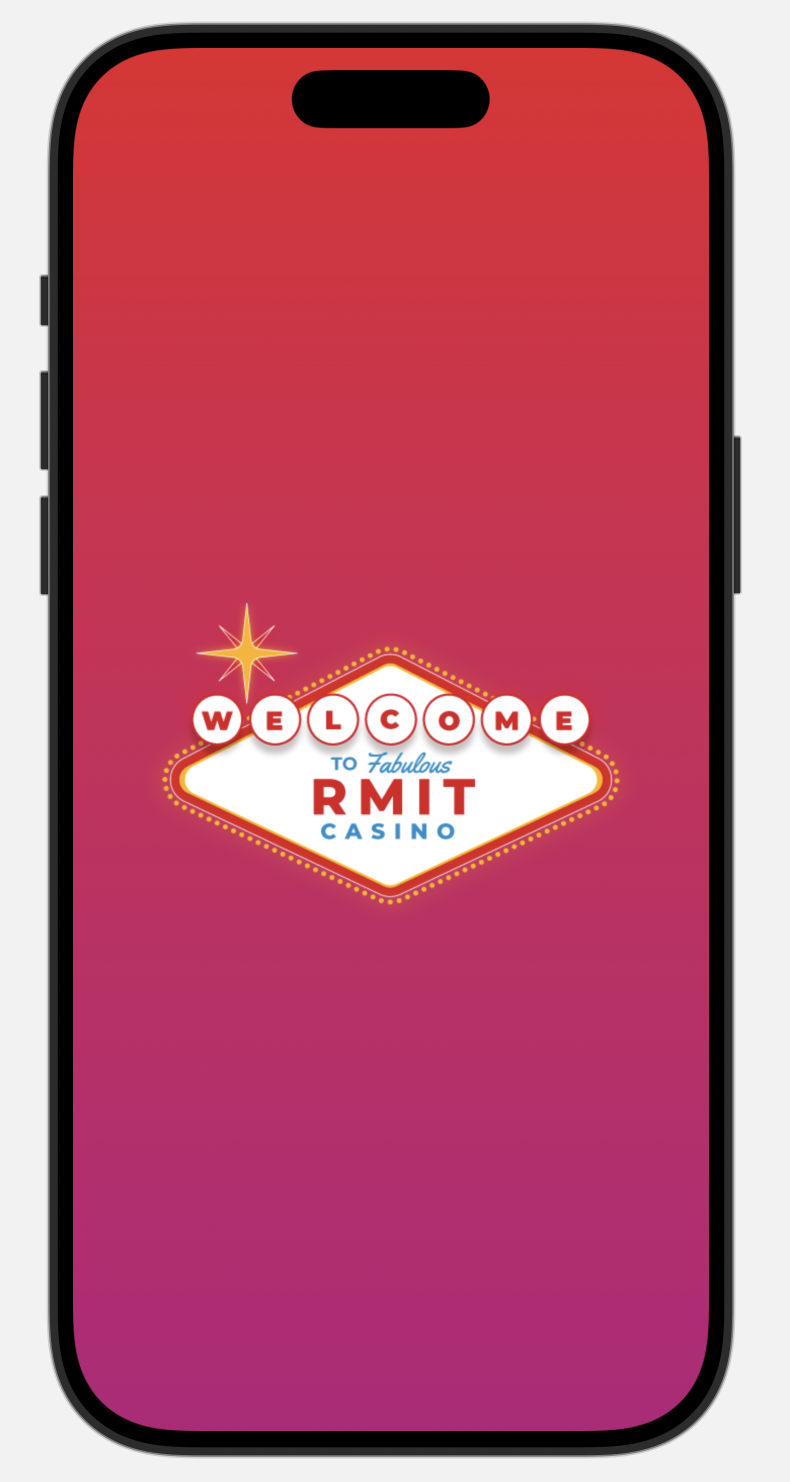
Breaking down the UI into smaller, reusable views like LogoView is a core concept
in SwiftUI. It keeps our ContentView clean and makes the LogoView easy
to reuse or modify later.
// LogoView.swift
import SwiftUI

struct LogoView: View {
    let logoFileName: String

    var body: some View {
        Image(logoFileName)
            .resizable()
            .scaledToFit()
            .frame(minWidth: 250, idealWidth: 280, maxWidth: 320, alignment: .center)
    }
}

#Preview {
    LogoView(logoFileName: "rmit-casino-welcome-logo")
}
// ContentView.swift
struct ContentView: View {
var body: some View {
ZStack {
// MARK: - Background
LinearGradient(gradient: Gradient(colors: [Color("ColorRedRMIT"), Color("ColorPurpleRMIT")]), startPoint: .top, endPoint: .bottom)
.edgesIgnoringSafeArea(.all)
VStack {
// MARK: - Logo
LogoView(logoFileName: "rmit-casino-welcome-logo")
Spacer() // Add a spacer to push content to the top and bottom
}
.padding()
}
}
}
#Preview {
ContentView()
}
✨ 3. Creating Reusable Modifiers
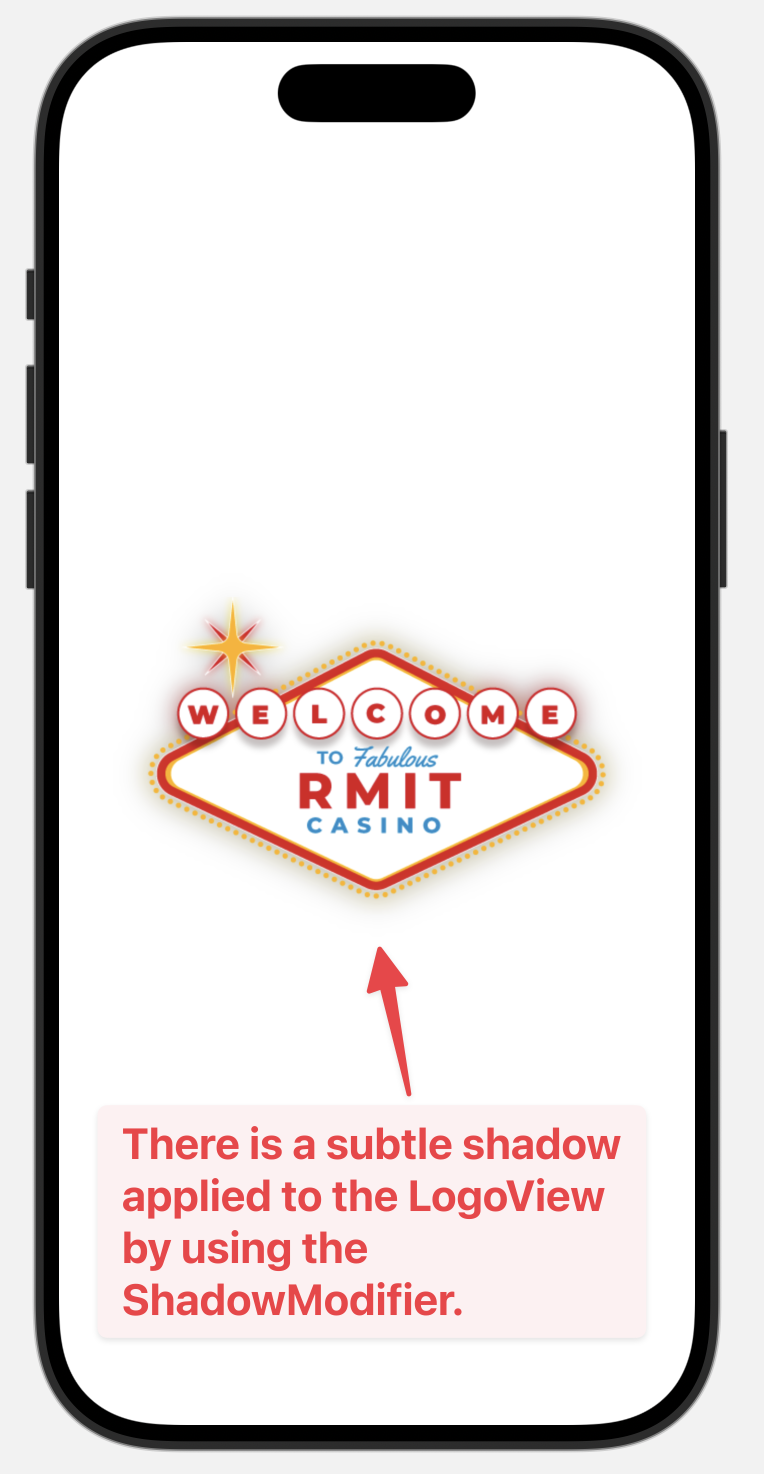
Step 5: Create the ShadowModifier
Instruction:
- Create another new file. Right-click on the
RMITCasinofolder, select "New File...", choose "Swift File", and name itModifiers.swift. - Inside
Modifiers.swift, add the code forShadowModifier.
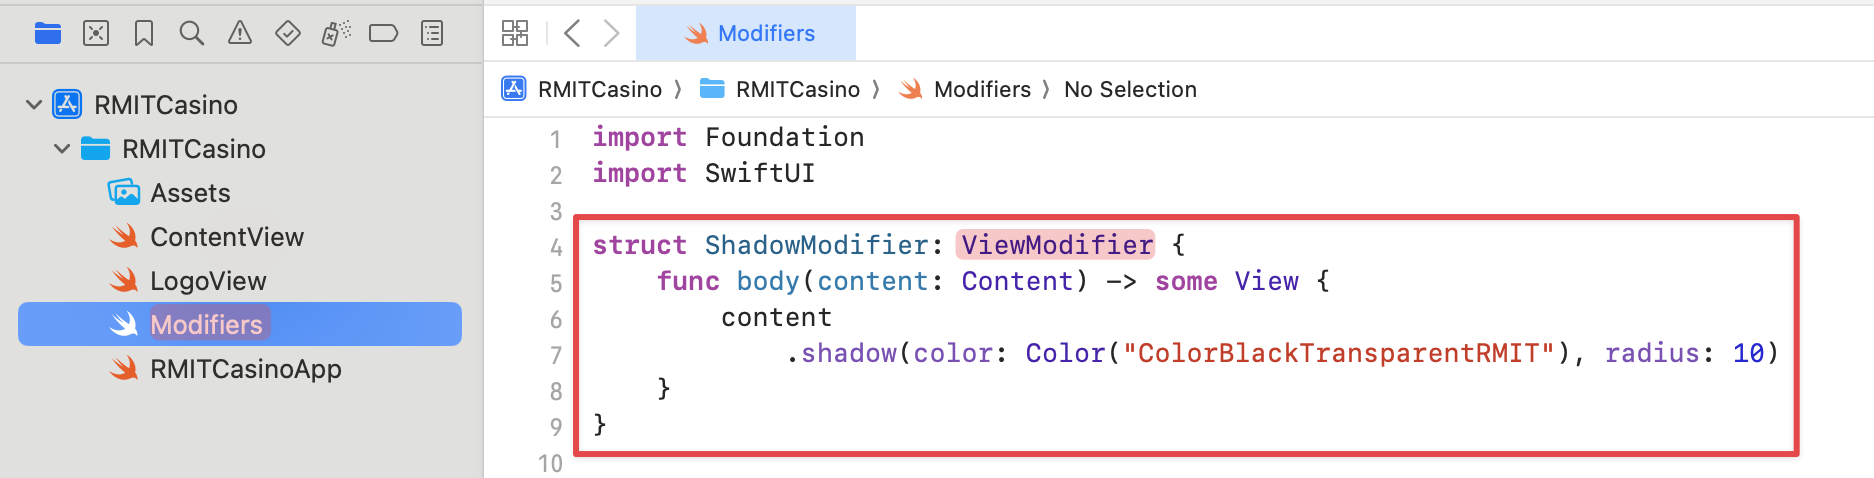
Explanation:
A ViewModifier is a reusable set of modifiers. We will apply a specific shadow
style to many UI elements. Creating a custom ShadowModifier saves us from repeating
the same .shadow(...) code everywhere and ensures a consistent look.
// Modifiers.swift
import Foundation
import SwiftUI

struct ShadowModifier: ViewModifier {
    func body(content: Content) -> some View {
        content
            .shadow(color: Color("ColorBlackTransparentRMIT"), radius: 10)
    }
}
Step 6: Apply ShadowModifier to LogoView
Instruction:
Open LogoView.swift and apply your new ShadowModifier to the
Image.
Explanation:
We apply a custom modifier using the .modifier() syntax. This attaches the shadow
effect defined in ShadowModifier to our logo.
// LogoView.swift
struct LogoView: View {
    let logoFileName: String

    var body: some View {
        Image(logoFileName)
            .resizable()
            .scaledToFit()
            .frame(minWidth: 250, idealWidth: 280, maxWidth: 320, alignment: .center)
            .modifier(ShadowModifier()) // <-- ADDED: Applies our custom shadow style
    }
}
🏗️ 4. Building the Static UI
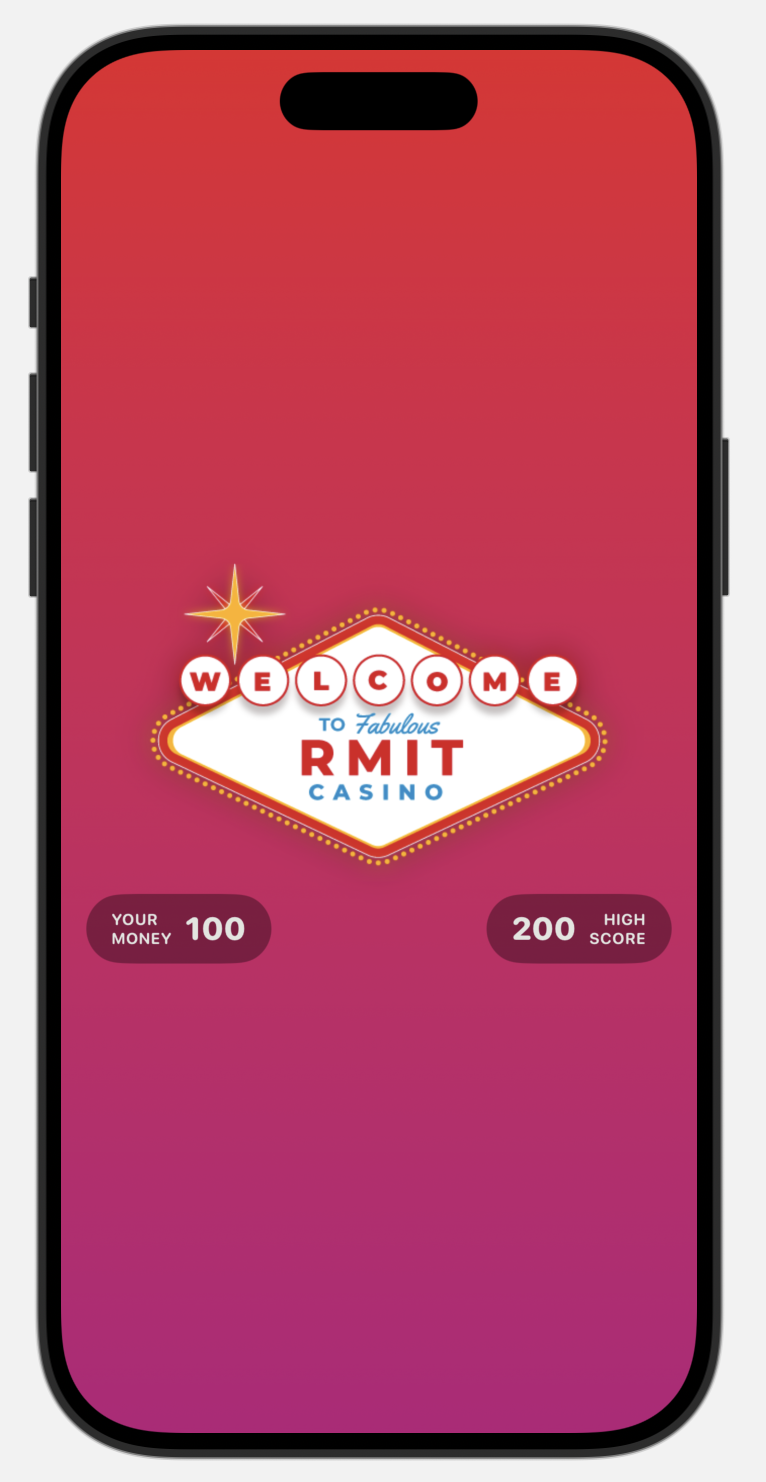
Step 7: Add Score Boards
Instruction:
In ContentView.swift, below the LogoView, add an HStack
to create the layout for the player's money and high score boards. Use hardcoded text for now.
Explanation:
We use an HStack to arrange the two scoreboards horizontally. Each scoreboard is
itself an HStack containing a label and a score. Spacer() is a
flexible view that expands to fill available space, pushing the two scoreboards to opposite
sides of the screen.
// Inside the VStack, after LogoView
// MARK: - Score boards
HStack {
    // Left-side score board
    HStack{
        Text("Your\nMoney".uppercased())
            .multilineTextAlignment(.leading)

        Text("100")
    }

    Spacer() // Pushes the two HStacks apart

    // Right-side score board
    HStack{
        Text("200")

        Text("High\nScore".uppercased())
            .multilineTextAlignment(.trailing)
    }
}
Step 8: Create and Apply Score Board Modifiers
Instruction:
- Open
Modifiers.swiftand add the three newViewModifierstructs:scoreLabelStyle,scoreNumberStyle, andscoreCapsuleStyle. - Open
ContentView.swiftand apply these new modifiers to the score board views as shown in the code snippet.
Explanation:
We are creating three distinct styles: one for the text labels ("Your Money"), one for the
numbers ("100"), and one for the capsule-shaped background. This approach keeps styling logic
separate from the layout code in ContentView, making it much cleaner.
// Add these structs to Modifiers.swift
// Styles the text labels like "Your Money"
struct scoreLabelStyle: ViewModifier {
    func body(content: Content) -> some View {
        content
            .foregroundColor(Color("ColorWhiteRMIT"))
            .font(.system(size: 10, weight: .bold,design: .rounded))
    }
}

// Styles the score numbers like "100"
struct scoreNumberStyle: ViewModifier {
    func body(content: Content) -> some View {
        content
            .foregroundColor(Color("ColorWhiteRMIT"))
            .font(.system(size: 20, weight: .heavy,design: .rounded))
    }
}

// Creates the capsule background for the score boards
struct scoreCapsuleStyle: ViewModifier {
    func body(content: Content) -> some View {
        content
            .padding(.vertical,10)
            .padding(.horizontal,16)
            .background(
                Capsule()
                    .foregroundColor(Color("ColorBlackTransparentRMIT"))
            )
    }
}
// Replace the previous score board HStack with this
HStack {
HStack{
Text("Your\nMoney".uppercased())
.modifier(scoreLabelStyle()) // <-- APPLY MODIFIER
.multilineTextAlignment(.leading)
Text("100")
.modifier(scoreNumberStyle()) // <-- APPLY MODIFIER
}
.modifier(scoreCapsuleStyle()) // <-- APPLY MODIFIER
Spacer()
HStack{
Text("200")
.modifier(scoreNumberStyle()) // <-- APPLY MODIFIER
Text("High\nScore".uppercased())
.modifier(scoreLabelStyle()) // <-- APPLY MODIFIER
.multilineTextAlignment(.trailing)
}
.modifier(scoreCapsuleStyle()) // <-- APPLY MODIFIER
}
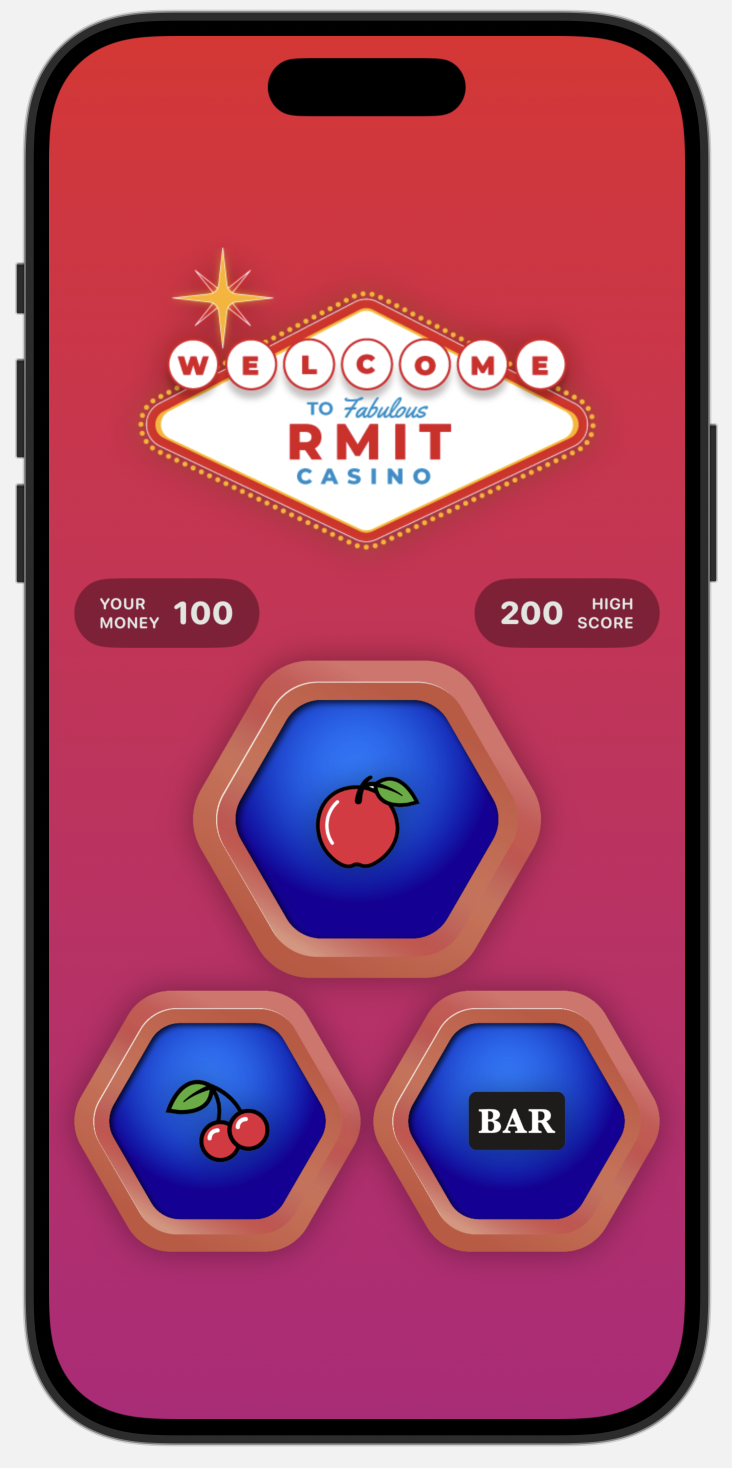
Step 9: Add Slot Machine and Reel Modifiers
Instruction:
- First, add the
ReelImageModifierandIconImageModifierto yourModifiers.swiftfile. - Then, in
ContentView.swift, inside the mainVStackand below the score boards, add the code for the slot machine reels. UseZStackto place an icon image on top of a reel background image. - Apply the new modifiers to the images as you create them.
Explanation:
We are building the visual structure of the slot machine. Each reel is a ZStack
containing the background reel image and the icon. The ReelImageModifier and
IconImageModifier ensure all images are sized correctly and have our standard
shadow. For now, we'll use hardcoded icon images like "apple" and "cherry".
// Add these structs to Modifiers.swift
// Styles the background reel images
struct ReelImageModifier: ViewModifier {
    func body(content: Content) -> some View {
        content
            .scaledToFit()
            .frame(minWidth: 140, idealWidth: 200, maxWidth: 220, alignment: .center)
            .modifier(ShadowModifier())
    }
}

// Styles the icon images (apple, cherry, etc.)
struct IconImageModifier: ViewModifier {
    func body(content: Content) -> some View {
        content
            .scaledToFit()
            .frame(minWidth: 50, idealWidth: 60, maxWidth: 70, alignment: .center)
            .modifier(ShadowModifier())
    }
}
// Inside the main VStack, after the score boards
// MARK: - Slot Machine
VStack {
// MARK: - First Reel
ZStack {
Image("reel")
.resizable()
.modifier(ReelImageModifier())
Image("apple") // Hardcoded for now
.resizable()
.modifier(IconImageModifier())
}
HStack {
// MARK: - Second Reel
ZStack {
Image("reel")
.resizable()
.modifier(ReelImageModifier())
Image("cherry") // Hardcoded for now
.resizable()
.modifier(IconImageModifier())
}
Spacer()
// MARK: - Third Reel
ZStack {
Image("reel")
.resizable()
.modifier(ReelImageModifier())
Image("bar") // Hardcoded for now
.resizable()
.modifier(IconImageModifier())
}
}
}
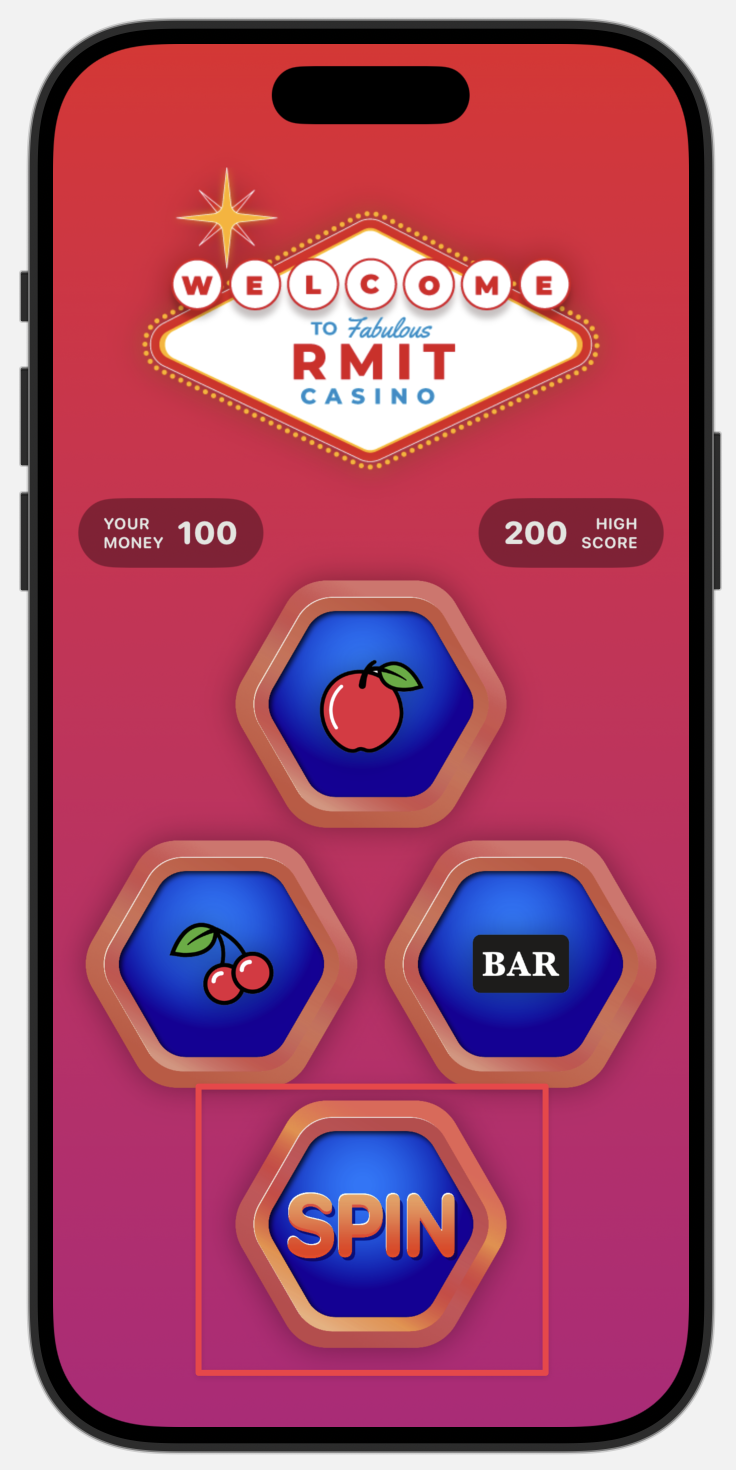
Step 10: Add the Spin Button
Instruction:
In ContentView.swift, at the end of the slot machine VStack, add a
Button with the "spin" image. The action can just print a message for now.
Explanation:
This adds the primary interactive element to our game. We use a Button view, and
for its label, we provide our "spin" image, styled with the ReelImageModifier to
match the reels above it. The `action` is a closure—a piece of code that will run when the
button is tapped.
// Inside the slot machine VStack, after the HStack for the reels
// MARK: - Spin Button
Button(action: {
    // This code runs when the button is tapped
    print("Spin!!!")
}, label: {
    Image("spin")
        .resizable()
        .modifier(ReelImageModifier())
})
Step 11: Add the Footer and its Modifiers
Instruction:
- Add the
BetCapsuleModifierandCasinoChipModifierto yourModifiers.swiftfile. - In
ContentView.swift, at the bottom of the mainVStack, add anHStackfor the footer. - Build the footer UI using
TextandImageviews, and apply the new modifiers.
Explanation:
This step builds the static UI for the betting controls. The BetCapsuleModifier
creates a stylish, gradient-filled capsule for the bet amounts, and the
CasinoChipModifier sizes the chip images appropriately.
// Add these structs to Modifiers.swift
// Styles the bet amount text ("10", "20")
struct BetCapsuleModifier: ViewModifier {
    func body(content: Content) -> some View {
        content
            .foregroundColor(Color("ColorWhiteRMIT"))
            .font(.system(size: 25, weight: .heavy, design: .rounded))
            .modifier(ShadowModifier())
            .background(
                // The capsule is filled with a gradient for a nice visual effect
                Capsule()
                    .fill(
                        LinearGradient(gradient: Gradient(colors: [Color("ColorYellowRMIT"), Color("ColorRedRMIT")]), startPoint: .top, endPoint: .bottom)
                    )
                    .frame(width: 80, height: 50, alignment: .center)
            )
    }
}

// Styles the casino chip images
struct CasinoChipModifier: ViewModifier {
    func body(content: Content) -> some View {
        content
            .scaledToFit()
            .frame(height: 70)
            .modifier(ShadowModifier())
    }
}
// At the end of the main VStack, after the slot machine VStack
// MARK: - Footer
HStack {
// MARK: - Bet 20
HStack(spacing: 30) {
Text("20")
.modifier(BetCapsuleModifier())
Image("casino-chips")
.resizable()
.modifier(CasinoChipModifier())
}
Spacer()
// MARK: - Bet 10
HStack(spacing: 30) {
Image("casino-chips")
.resizable()
.modifier(CasinoChipModifier())
.opacity(0) // Hidden for now
Text("10")
.modifier(BetCapsuleModifier())
}
}
.padding(.horizontal, 20)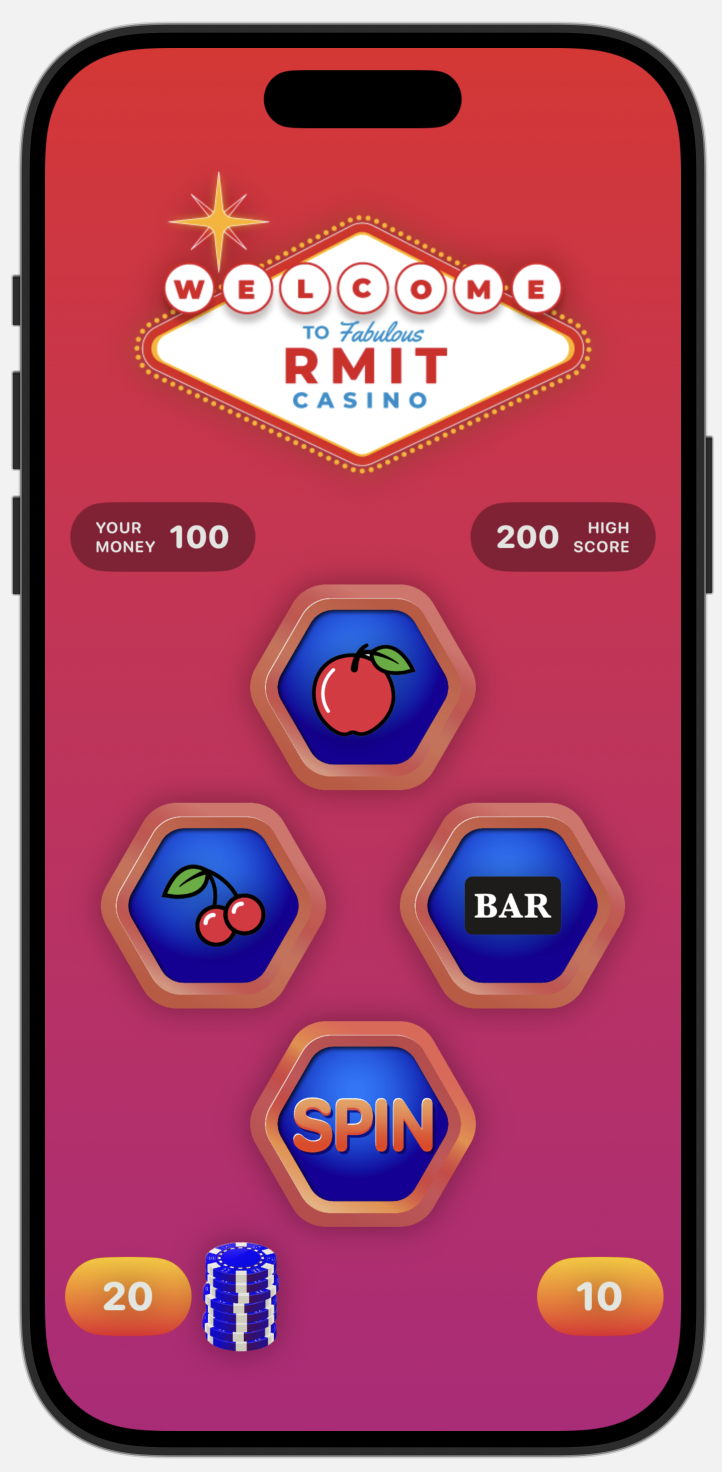
🧠 5. Adding Game Logic
Step 12: Add Game Logic
Instruction: Now we will make the game interactive.
- Add Icon Array: In
ContentView.swift, at the top of theContentViewstruct, add a constant arrayiconsthat holds the names of all your slot icon images. - Add State: Below the
iconsarray, add a@Statevariable namedreelsto store the current state of the three reels. - Update Reels: Go to the slot machine UI code and replace the hardcoded
image names (
"apple","cherry","bar") with references to your new state variable, likeicons[reels[0]]. - Create Spin Function: Add a
spinReels()function inside theContentViewstruct. This function will assign a new random index to each item in thereelsarray. - Connect Button: Find the "spin"
Buttonand change its action to call your newspinReels()function.
Explanation: This is where the magic happens.
- The
iconsarray gives us a single source for all possible outcomes. - The
@Stateproperty wrapper tells SwiftUI to watch thereelsvariable for any changes. - When the user taps the spin button, the
spinReels()function is called, which changes the values in thereelsarray. - Because
reelsis a@Statevariable, SwiftUI automatically detects this change and re-draws the parts of the UI that depend on it (the icon images), showing the new random combination.
// ContentView.swift
import SwiftUI

struct ContentView: View {
    // MARK: - PROPERTIES
    // This array holds the names of all the icon images.
    let icons = ["apple","bar","cherry","clover","diamond", "grape", "heart", "horseshoe","lemon","melon","money","orange"]

    // @State tells SwiftUI to watch this variable for changes.
    // When it changes, the UI will automatically update.
    // It stores the index of the icon for each of the three reels.
    @State private var reels = [0,1,2]

    // MARK: - FUNCTIONS
    func spinReels(){
        // Randomize the icon for each reel.
        reels[0] = Int.random(in: 0...icons.count - 1)
        reels[1] = Int.random(in: 0...icons.count - 1)
        reels[2] = Int.random(in: 0...icons.count - 1)
    }

    var body: some View {
        ZStack {
            // ... (Background code is unchanged)

            VStack {
                // ... (Logo and Score boards are unchanged)

                // MARK: - Slot Machine
                VStack {
                    // MARK: - First Reel
                    ZStack {
                        Image("reel")
                            .resizable()
                            .modifier(ReelImageModifier())
                        // CHANGED: Display the icon from our state array
                        Image(icons[reels[0]])
                            .resizable()
                            .modifier(IconImageModifier())
                    }

                    HStack {
                        // MARK: - Second Reel
                        ZStack {
                            Image("reel")
                                .resizable()
                                .modifier(ReelImageModifier())
                            // CHANGED: Display the icon from our state array
                            Image(icons[reels[1]])
                                .resizable()
                                .modifier(IconImageModifier())
                        }

                        Spacer()

                        // MARK: - Third Reel
                        ZStack {
                            Image("reel")
                                .resizable()
                                .modifier(ReelImageModifier())
                            // CHANGED: Display the icon from our state array
                            Image(icons[reels[2]])
                                .resizable()
                                .modifier(IconImageModifier())
                        }
                    }

                    // MARK: - Spin Button
                    Button(action: {
                        // CHANGED: Call the spinReels function
                        spinReels()
                    }, label: {
                        Image("spin")
                            .resizable()
                            .modifier(ReelImageModifier())
                    })
                }

                // ... (Footer is unchanged)
            }
            .padding()
        }
    }
}

#Preview {
    ContentView()
}
🥳 Congratulations!
Awesome job! You've just brought the RMIT Casino app to life. Fire it up in the simulator, hit that spin button, and see your creation in action as the reels whirl and land on a random combination. This is the foundation of your game—and it's already looking great!
🚀 Level Up Your Skills: Bonus Challenges!
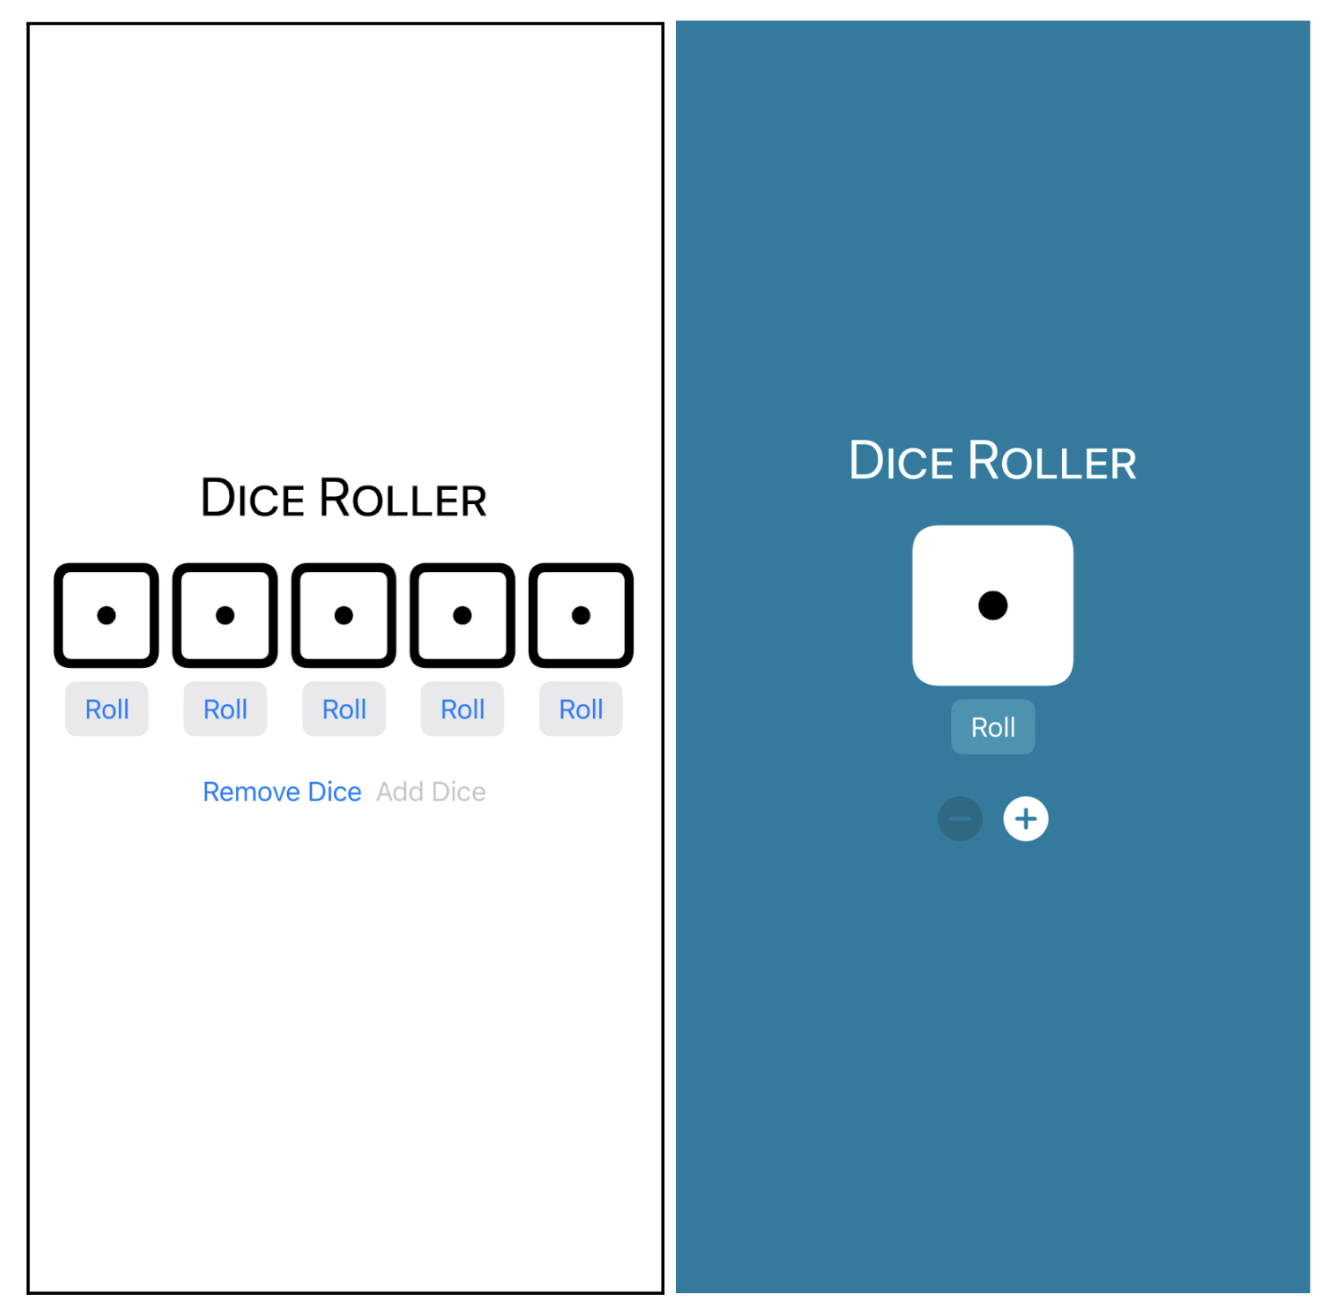
Challenge 1: Apple Dice Game 🎲
To warm up, let’s create a fun app to roll virtual dice with the functionality to increase or decrease the number of dice on the screen to play different kinds of games. Please follow Apple SwiftUI tutorial here: https://developer.apple.com/tutorials/develop-in-swift/update-the-ui-with-state
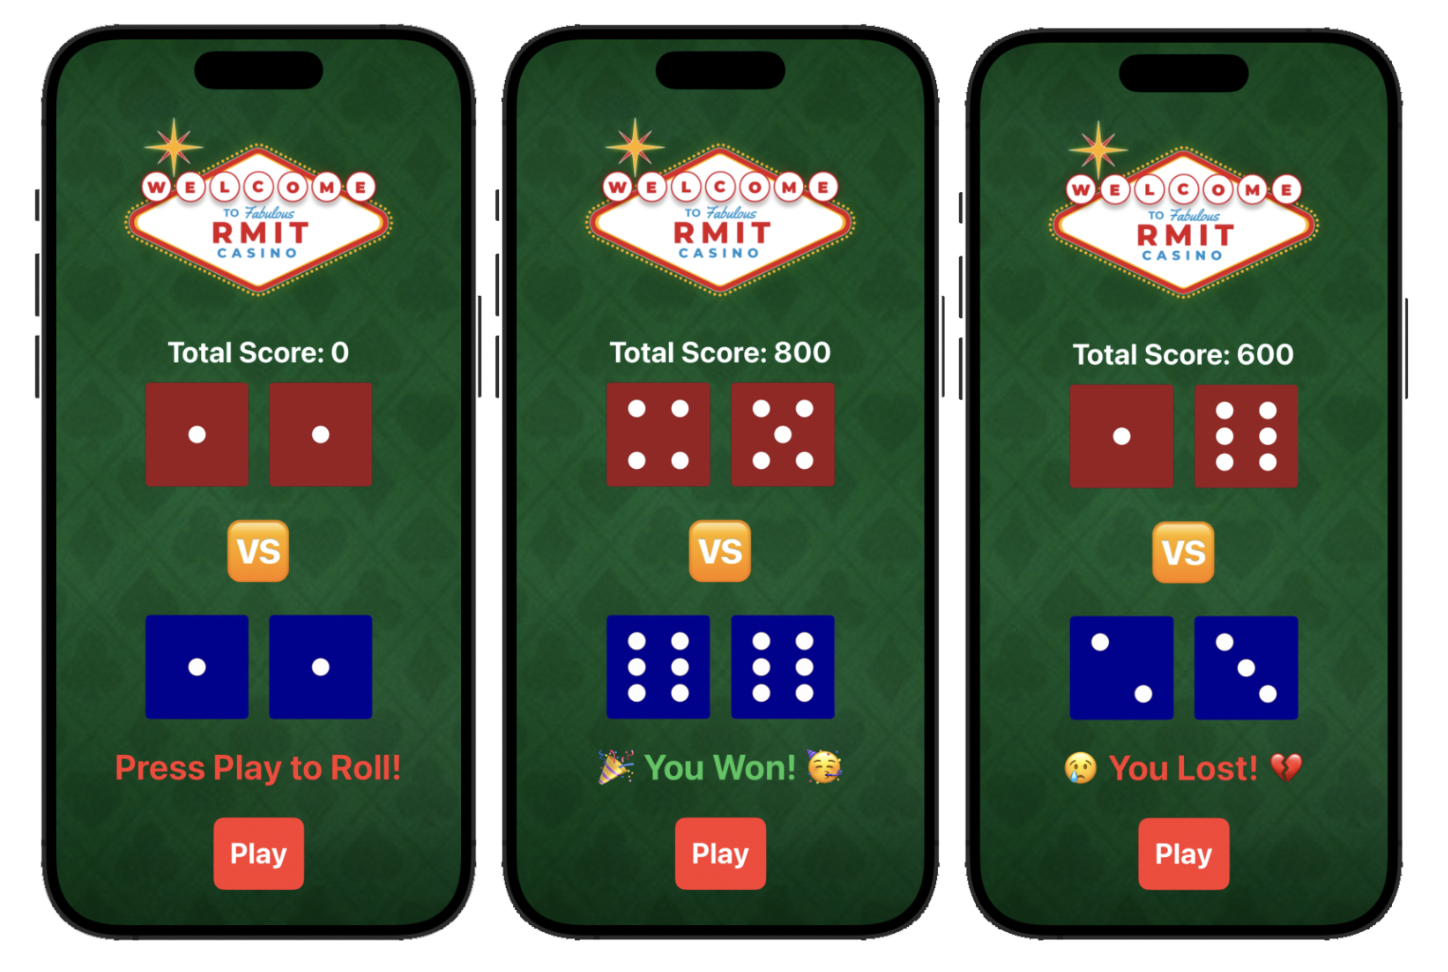
Challenge 2: RMIT Red & Blue Dice Game 🎲
You play blue dice. The AI opponent plays red dice. When you press the “Play” button, dice rolls are randomized. If your total sum of dice is greater than your opponent then you will win and see the winning message like in the demo screenshot below. Otherwise, you lose and see the lost message. Add some sound effects when you win or you lose. You can select free game sound effects here:
All image assets of this dice game can be downloaded on Canvas. You can also find the dice images in the Asset Gallery. However you are encouraged to choose your own image assets and colorsets.
Extra challenge: Add a total score text on the top of the game. Add +100 points for any winning game and -100 points for any losing game.
🎉 What's Next?
You've Mastered the Basics!
You've successfully built the foundation of the RMIT Casino app. Along the way, you've learned key SwiftUI concepts:
- Setting up a project and managing assets in the Asset Catalog.
- Building complex layouts with
ZStack,VStack, andHStack. - Creating reusable styles with custom
ViewModifiers to keep your code clean and consistent. - Making your UI interactive with
@Statevariables andButtonactions.
Now that you have a working game, why not take on the Bonus Challenges? They are a great way to test your skills and learn even more.
Ready for more? In Part 2 of this guide, we will take this game to the next level by adding betting logic, calculating winnings, managing player scores, and adding sound effects to create a fully immersive casino experience. Stay tuned!